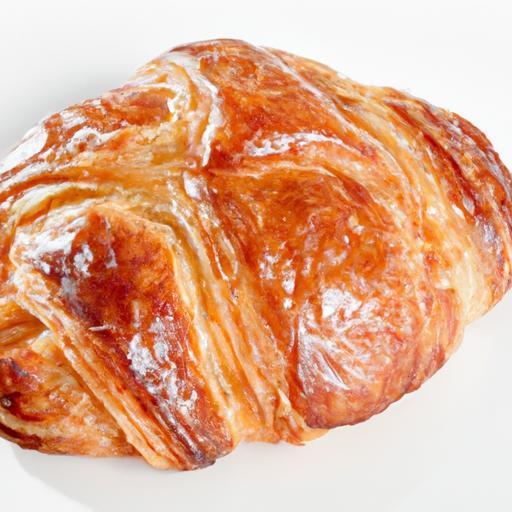
There’s something magical about a perfectly flaky pastry crust-the delicate layers that melt in your mouth, the golden-brown hue that promises buttery richness, and that satisfying crispness with every bite. Yet, mastering pastry dough can often feel like an elusive art, a delicate dance between precision and intuition. Whether you’re crafting a rustic pie, a refined tart, or buttery croissants, understanding the secrets behind that impeccable crust is key.In this article, we’ll unravel the mysteries of pastry dough, exploring time-tested techniques and little-known tips that will elevate your baking from good to unforgettable. Prepare to transform simple ingredients into culinary masterpieces, one flaky layer at a time.
Mastering Pastry Dough: Secrets to Flaky, Perfect Crusts
mastering pastry dough begins with carefully selecting the finest ingredients, each playing a crucial role in achieving that coveted flaky, tender texture.From the choice of flour and butter to the technique of folding chilled dough layers,every detail counts toward transforming humble components into golden,crisp perfection. whether crafting a buttery pie crust or flaky puff pastry, this guide will inspire confidence and elevate your baking prowess.
Prep and Cook Time
- Preparation: 30 minutes
- Chilling Time: 1 hour (including intermittent chilling during folding)
- Baking: 20-30 minutes
- Total Time: Approximately 2 hours
Yield
Makes one 9-inch pie crust or equivalent pastry dough for 8 servings
Difficulty Level
Medium - requires patience and precision with cold dough handling
Ingredients
- 1 ¼ cups all-purpose flour,sifted and chilled
- ½ cup (1 stick) unsalted butter,cold and cubed
- 1 teaspoon fine sea salt
- 2-4 tablespoons ice-cold water
- Optional: 1 tablespoon granulated sugar for a lightly sweet crust
Instructions
- Combine flour and salt in a large mixing bowl. If using sugar, add it now for a subtle sweetness.
- Cut in the cold butter using a pastry cutter or your fingertips until the mixture resembles coarse crumbs, with some pea-sized butter pieces remaining. The key is to keep everything cold - butter lumps create steam pockets, crucial for flakiness.
- Sprinkle in 2 tablespoons of ice-cold water and gently mix with a fork. Add more water, one tablespoon at a time, just until the dough holds together when pinched. Avoid overhydrating; the dough should be firm, not sticky.
- Shape the dough into a flat disk,wrap tightly in plastic wrap,and chill in the refrigerator for at least 30 minutes to rest and solidify the fat.
- On a lightly floured surface, roll the dough into a rectangular shape about ¼-inch thick. Fold it into thirds like a letter (this is your first fold), then rotate the dough 90 degrees.
- Roll and fold the dough 3 to 4 more times, chilling it in the fridge for 15 minutes after every two folds. This layering technique traps butter between dough sheets, building the delicate layers needed for flaky texture.
- After the final fold, wrap the dough disk again and chill for at least 30 minutes before shaping for your pie or tart.
- Preheat your oven to 400°F (200°C). trim and flute the edges of your crust as desired, brush with a lightly beaten egg or milk for golden sheen, then bake until crust edges are deep golden brown and crisp, about 20-30 minutes.
Tips for Success: Keeping Dough Cold for Flakiness
- Use cold, unsalted butter and keep it cubed or shredded for quicker incorporation without warming the dough.
- Chill your bowl, flour, and utensils whenever possible to maintain low temperature during mixing.
- minimize handling to avoid melting the butter with your hands; consider wearing thin kitchen gloves.
- Frequent chilling during folding is essential to preserve distinct layers – this is the cornerstone of a flaky crust.
- If dough becomes soft or sticky at any stage, return it to the fridge for 15-20 minutes before continuing.
Serving Suggestions
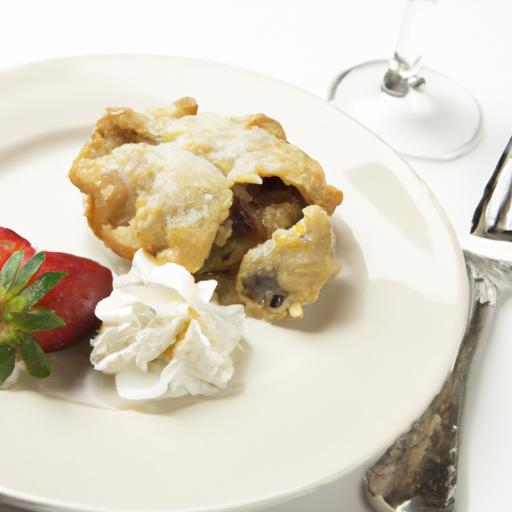
This pastry dough is wonderfully versatile – perfect for fruit pies, savory quiches, or elegant tartlets. Serve a golden peach or apple pie warm, paired with a scoop of vanilla bean ice cream, and garnish with fresh mint leaves for a splash of color. For savory creations, fill with roasted vegetables, cheese, and herbs, then top with flaky sea salt crystals to highlight the crust’s texture.

Related Resource
For perfect pie filling recipes that complement your flawless crusts, check out our Perfect Fruit Pie fillings guide.
Further Reading
Discover the science behind pastry layers and gluten development with this detailed guide from King Arthur Baking.
| Nutrition per Serving (⅛ of dough) | Calories | Protein | Carbs | Fat |
|---|---|---|---|---|
| 180 | 2 g | 20 g | 9 g |
Q&A
Q&A: Mastering Pastry Dough – Secrets to Flaky, Perfect Crusts
Q1: What’s the secret to achieving a perfectly flaky pastry crust?
A1: The magic lies in the marriage of cold ingredients and minimal handling. Keeping your butter chilled and working quickly prevents the fat from melting into the flour prematurely, which creates those coveted pockets of steam that puff up during baking, giving you a tender, flaky texture.Think of it as a delicate dance between temperature and timing!
Q2: Why is temperature so critically important when making pastry dough?
A2: Temperature is the pastry chef’s silent ally. Cold ingredients keep the fat solid, which is key to creating layers. Warm butter gets absorbed into the flour, resulting in a dense, tough crust rather of a light, flaky one. always chill your flour, butter, and even water if possible, and keep your kitchen cool for the best results.
Q3: How does the choice of fat affect the final crust?
A3: Butter gives flavor and a beautiful golden color, while shortening or lard can yield an even flakier texture due to their unique melting points. Many bakers swear by a blend of butter and shortening-combining butter’s rich taste with shortening’s reliability creates the best of both worlds.
Q4: Can I use a food processor to make pastry dough?
A4: Absolutely! A food processor is a fantastic tool for cutting fat into flour quickly and evenly. The key is to pulse gently-over-processing can generate too much heat and develop gluten, toughening your crust. You want pea-sized bits of butter still visible for maximum flakiness.
Q5: How critically important is resting the dough before baking?
A5: Resting is crucial. After mixing, chilling the dough allows the gluten strands to relax, preventing shrinkage during baking, and keeps the fat firm. A good 30 minutes to an hour in the fridge makes a world of difference in texture and workability.
Q6: What role does water play in shaping the dough?
A6: Water binds the flour and fat together, but too much and the dough becomes sticky and tough. Just add enough ice-cold water to bring the dough together, without overhydrating. Some bakers brush cold water over folded dough layers to enhance flakiness-it’s all about precision.Q7: how do I avoid a soggy bottom crust?
A7: Pre-bake (blind bake) your crust if you’re dealing with wet fillings like custards or fruit. Using pie weights keeps the dough flat and prevents bubbling. Also, brushing the crust with egg wash or melted butter before filling creates a moisture barrier for crispness.
Q8: Any tips for rolling out pastry dough perfectly?
A8: Dust your surface and rolling pin lightly with flour to prevent sticking, but don’t overdo it-too much flour can dry out your dough. Roll from the center outward gently, turning the dough a quarter turn after each roll to maintain even thickness and shape. Patience and a light touch are your best friends here.Q9: What is the “lamination” technique in pastry making?
A9: Lamination is the process of folding and rolling dough layered with fat to create thousands of delicate sheets. It’s the technique behind puff pastry and croissants. Each fold traps air and fat, resulting in remarkable flakiness. While classic pie dough isn’t laminated, gentle layering of butter can enhance texture.
Q10: How can I add flavor without sacrificing texture?
A10: Mix-ins like sugar, herbs, or spices add dimension, but keep additions minimal to avoid disrupting the dough’s structure. For example, a pinch of cinnamon in apple pie crust or fresh thyme in savory tart dough can elevate your pastry.Also, consider finishing touches like sprinkling coarse sugar on top for crunch and shine.
Mastering pastry dough is both an art and a science-respecting ingredients, understanding technique, and embracing a little patience yields crusts that flake, crumble, and delight.Now, go forth and bake your way to flaky perfection!
In Retrospect
As you embark on your journey to master pastry dough, remember that each fold, chill, and roll brings you closer to that sublime, buttery flake that defines perfection. Pastry making is as much an art as it is a science-an alchemy of precise technique and patient intuition. With these secrets in hand, your crusts will no longer be just a base, but the star of your culinary creations, whispering stories of buttery richness and tender layers with every bite. So wield your rolling pin with confidence, embrace the rhythms of dough and butter, and watch as your oven transforms simple ingredients into flaky masterpieces worth savoring again and again.