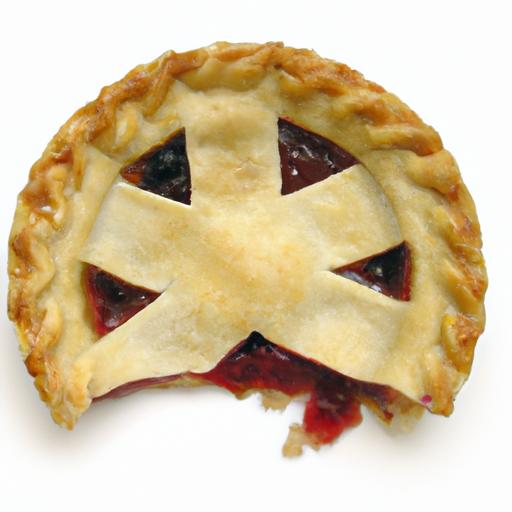
There’s something undeniably delightful about pie – that flaky, buttery crust giving way to a luscious, fruity filling beneath. But what if your pie could wear a little extra charm, a decorative flourish that transforms it from simply tasty to utterly enchanting? Enter the world of pie crust cut-out decorations: whimsical shapes and intricate designs crafted from the very dough that makes your pie so irresistible. In this article, we’ll guide you through easy and creative techniques to craft charming pie crust cut-outs that not only elevate the look of your dessert but also add a personal, artistic touch – no fancy tools or elaborate skills required. Get ready to turn your homemade pies into edible works of art that captivate both the eyes and the palate!
Crafting Charming Pie Crust Cut-Out Decorations with Ease: Choosing the Perfect Dough for Flawless Cut-Out Shapes
Crafting charming pie crust cut-out decorations with ease begins with selecting the ideal dough that offers both structure and tenderness. Whether you’re aiming for intricate snowflakes or rustic floral motifs, mastering your dough choice is the foundation of flawless, beautifully defined shapes that hold their form after baking.
Prep and Cook Time
- Preparation: 30 minutes
- Chilling: 1 hour
- baking: 15-20 minutes
- Total Time: Approximately 2 hours
Yield
Makes enough pie crust decorations for 1 standard 9-inch double-crust pie, plus extra cut-outs for garnish.
Difficulty Level
Medium – basic baking skills recommended but approachable with careful attention to technique.
Ingredients
- 1 1/4 cups all-purpose flour, sifted for airy, smooth texture
- 1/4 teaspoon salt to enhance flavour balance
- 1/2 cup unsalted butter, cold and cubed for flakiness
- 2-3 tablespoons ice water, added gradually to bind dough
- 1 teaspoon granulated sugar (optional, for slight browning and subtle sweetness)
Instructions
- Mix dry ingredients: In a bowl, combine all-purpose flour, salt, and sugar. Whisk together to evenly distribute.
- Cut in butter: Using a pastry blender or your fingertips, work cold butter cubes into the flour mixture until pea-sized crumbs form. Keep the butter cold to ensure crisp, flaky edges on your cut-outs.
- add ice water: Spoon 2 tablespoons of ice water over the mixture. Gently toss with a fork or your hands, adding more water a teaspoon at a time until the dough just comes together. Avoid overworking to prevent toughness.
- Form dough and chill: Gather dough into a disk, wrap in plastic wrap, and chill for at least 1 hour. Resting allows gluten to relax, making rolling easier and preventing shrinkage during baking.
- Roll with care: On a lightly floured surface, roll dough evenly to 1/8 inch thickness for crisp edges that hold shape well. Rotate the dough often to maintain a round shape and even thickness.
- Cut shapes: Use sharp cookie cutters or stencils to press out your designs. avoid twisting cutters to keep edges clean and sharp. Gently transfer cut-outs to a parchment-lined baking sheet.
- Chill cut-outs again: Refrigerate cut shapes for 15-20 minutes before baking to firm up the butter and preserve form.
- Bake: Preheat oven to 375°F (190°C). Bake cut-outs for 12-20 minutes, depending on size, until edges are lightly golden but not browned.
- Cool: Remove from oven and let decorations cool completely on wire racks before handling or applying to your pie.
Chef’s Notes: Tips for Success
- Flour choice: All-purpose flour strikes a perfect balance between tenderness and structure. For a more delicate crumb, substitute up to 1/4 cup with cake flour.
- Butter alternatives: Unsalted butter is preferred for flavor and texture, but you can use high-quality vegetable shortening for sturdier shapes with slightly less flavor.
- Freezing dough: Dough discs freeze beautifully for up to one month. Thaw overnight in the fridge before rolling to maintain ease of handling.
- Roll between parchment: To avoid excess flour, roll dough between two sheets of parchment paper. This technique ensures smooth surfaces for crisp edges.
- Resting dough twice: Don’t skip chilling both before and after cutting shapes-this is essential for clean, crack-free edges.
Innovative Tools and Templates to Elevate Your Pie Crust Designs
Beyond customary cookie cutters, explore tools like silicone stencils, embossing rollers, and fine-tipped lattice cutters to add texture and dimension. Custom templates printed on parchment help create repeatable,precision patterns,enhancing your creativity. Using a thin, sharp knife or an X-Acto blade allows detailed designs unattainable with conventional cutters.
Creative Finishing Touches That Bring Your Decorations to Life
Transform simple cut-outs into eye-catching pie embellishments with techniques like brushing with egg wash, dusting edible glitter, or sprinkling coarse sugar crystals before baking for sparkle and shine. After baking, use natural food coloring or edible paints to highlight edges or patterns. Layering contrasting dough colors-such as a cinnamon-infused dough paired with classic-adds visual interest and a delicious aroma.
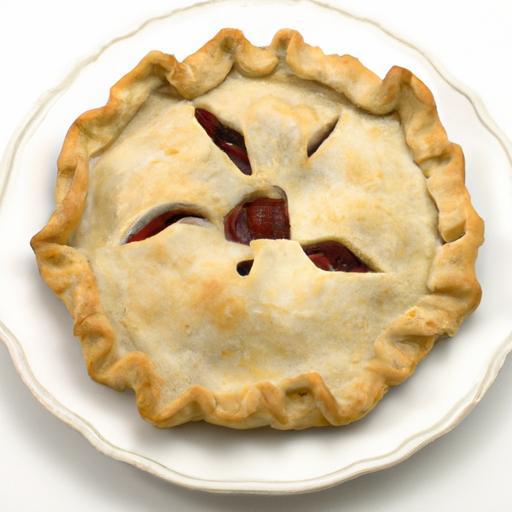
Serving Suggestions
present your pie adorned with artfully placed cut-out decorations for a stunning centerpiece. Dust lightly with powdered sugar for a seasonal touch or accompany with a scoop of vanilla bean ice cream and fresh berries to complement the buttery, flaky crust. Use extra cut-outs as edible garnishes on dessert plates or atop whipped cream-topped mugs of hot cocoa.

| Nutrient | Per Serving (1 slice w/ decorations) |
|---|---|
| Calories | 320 kcal |
| Protein | 4 g |
| Carbohydrates | 25 g |
| Fat | 22 g |
For even more inspiration, check out our guide on mastering pie crust basics. For detailed scientific insights into dough texture and flakiness, the King Arthur baking Science Centre offers excellent research-backed tips.
Q&A
Q&A: Crafting Charming Pie Crust Cut-Out Decorations with Ease
Q1: What inspired the trend of using pie crust cut-outs as decorations?
A1: Pie crust cut-outs trace their roots to the age-old tradition of transforming humble dough into edible art. Bakers, seeking to add personality and charm to their pies, began cutting whimsical shapes-flowers, leaves, stars-that tell a story even before the first bite. This practice marries culinary creativity with visual delight, turning each pie into a canvas.
Q2: What types of dough work best for cut-out decorations?
A2: For sturdy,crisp cut-outs that hold their shape,a classic buttery pie dough made from all-purpose flour,cold butter,a hint of sugar,and just enough ice-cold water is ideal. Avoid overly sticky or soft doughs; they can lose definition or become tough. Some bakers even incorporate a splash of vinegar or vodka to enhance flakiness and ease of rolling.
Q3: How do you prevent delicate shapes from warping or shrinking during baking?
A3: chill your cut-outs on a parchment-lined tray for at least 15 minutes before baking-cold dough bakes more predictably. Also, avoid overcrowding the pan to allow even heat circulation. If working with intricate designs, lightly docking (pricking) the dough with a toothpick can prevent excessive puffing. And remember: a hot oven, usually between 375°F to 400°F (190°C to 205°C), helps set the shapes quickly.
Q4: What creative tools can help craft charming decorations with ease?
A4: While traditional cookie cutters are a staple, inventive bakers harness miniature biscuit cutters, stencils, or even edible markers to add detail. For personalized flair,small craft knives or pastry wheels let you carve custom silhouettes. Silicone molds and embossing stamps also imbue textures, turning simple dough into intricate works of art.
Q5: Can I add color or flavor to my pie crust cut-outs?
A5: Absolutely! Finely ground spices like cinnamon or nutmeg can be kneaded into the dough for subtle warmth. For vibrant hues, natural powders like beetroot, spinach, or turmeric work wonders without compromising texture. Onc cut, brushing shapes with an egg wash mixed with a touch of vanilla or almond extract can add both shine and delicate fragrance.
Q6: How can pie crust cut-outs enhance the overall presentation of a pie?
A6: These decorations turn ordinary pies into enchanting showstoppers. Arranged as a lattice woven with leaves and berries,or sprinkled playfully across a top crust,they add dimension and intrigue. Their presence signals a baker’s love and attention to detail-and invites guests to savor not just the taste, but the visual poetry atop each slice.
Q7: Any tips for beginners to master pie crust cut-out decorations?
A7: Start simple! Choose basic shapes like hearts, stars, or circles and practice rolling dough uniformly. Keep your workspace and hands lightly floured to prevent sticking.Chill often, handle dough gently, and well… have fun! The more you experiment, the more your confidence-and your artistry-will rise, much like your perfectly baked pie.
Embrace the magic of pie crust cut-outs. With a pinch of patience and a dash of imagination, you can elevate your pies from delicious to delightfully decorative-no fancy tools or fancy skills required!
Wrapping Up
With these simple yet delightful techniques, crafting charming pie crust cut-out decorations becomes an accessible art form rather than a culinary challenge.Whether you’re aiming to add a whimsical touch to a family dessert or impress guests with intricate patterns, the key lies in patience, creativity, and a little practice. So next time you roll out your dough, remember that the crust isn’t just a vessel-it’s an invitation to decorate, personalize, and celebrate your baking with flair. Happy decorating, and may your pies always be as beautiful as they are delicious!