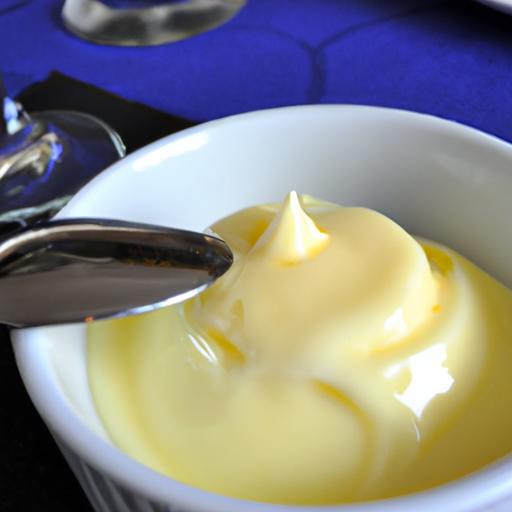
There’s something undeniably comforting about a bowl of smooth, velvety vanilla pudding-a timeless dessert that wraps you in creamy sweetness with every spoonful. While store-bought versions can be a rapid fix, nothing quite compares to the satisfaction of making homemade vanilla pudding from scratch. In this article, we’ll dive into the art of crafting this classic treat, revealing tips and techniques that transform simple ingredients into a luscious, dreamy delight. Whether your a seasoned baker or a curious kitchen adventurer, get ready to master the secrets behind that perfect creamy texture and rich vanilla flavor that will turn ordinary moments into indulgent memories.
choosing the Perfect Vanilla Beans for an Unmatched Flavor
creamy Delight starts with the heart of the recipe: vanilla beans. Not all vanilla beans are created equal, and selecting the right one transforms your pudding from ordinary to unusual. Opt for Madagascar Bourbon vanilla beans, prized for their rich, creamy, and slightly spicy aroma, delivering layers of depth perfect for a creamy vanilla pudding. Look for beans that are plump, moist, and flexible-avoid those that are dry or brittle as they lack flavor potency.
When you split the bean, scoop out the tiny shiny seeds inside-these are pure gold to your dish, bursting with intense flavor far beyond vanilla extract. Using whole vanilla beans means you avoid artificial undertones, creating the kind of authentic, indulgent flavor that turns simple pudding into a “Creamy Delight.”
Mastering the Creamy Texture Through Technique and Ingredients
Achieving the ultimate silky-smooth texture requires a balance of technique and choice ingredients.Start with whole milk and heavy cream; milk alone lacks the richness, while cream alone can be too dense.The custard base depends on egg yolks for natural thickening and a luxurious mouthfeel, while a touch of cornstarch lends stability without graininess.
Heat the mixture gently and stir constantly to prevent scorching and curdling. Use a medium-low flame and a silicone spatula for even heat distribution. The key is patience: cook until the pudding coats the back of the spoon, about 170°F (77°C).This guarantees the perfect creamy consistency without overcooking.
Step by Step Guide to Cooking and Cooling for the Ideal Pudding
- Prepare your vanilla bean: Using a sharp knife, carefully split the pod lengthwise and scrape out all the black seeds.
- Heat the dairy: In a saucepan, combine 2 cups whole milk, 1 cup heavy cream, and the scraped vanilla seeds plus the pod.Warm slowly over medium-low heat until just below boiling. Remove the vanilla pod before adding eggs.
- Whisk egg yolks and sugar: In a mixing bowl, whisk together 4 large egg yolks, ⅓ cup granulated sugar, and 3 tablespoons cornstarch until smooth and pale.
- Temper the eggs: Gradually pour about ½ cup of warm milk mixture into the egg yolk mixture while whisking continuously to prevent curdling.
- Combine and thicken: Return the tempered egg mixture to the saucepan. Cook over low heat, stirring constantly with a wooden spoon or silicone spatula, until the pudding thickens and coats the back of the spoon (about 5-7 minutes). Avoid boiling.
- Strain: For ultimate smoothness, strain the pudding through a fine mesh sieve into a clean bowl to catch any bits of cooked egg.
- Cool properly: cover the surface of the pudding with plastic wrap pressed directly onto it to prevent skin formation. Chill in the refrigerator for at least 3 hours or overnight, allowing flavors to meld and texture to set perfectly.
Creative Serving Ideas to Elevate Your Homemade Vanilla Pudding
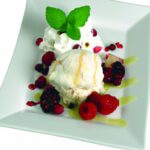
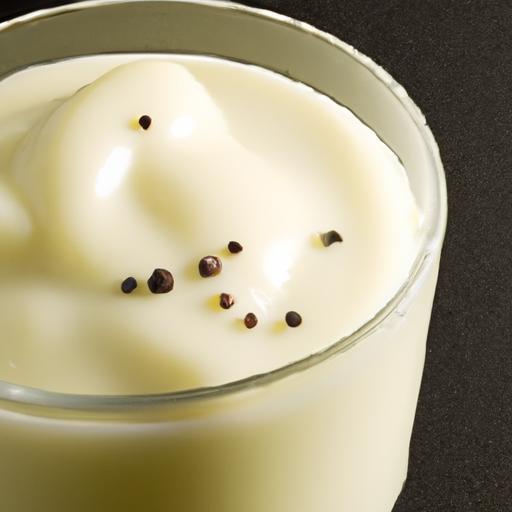
The beauty of this recipe lies not only in its sumptuous taste but also in its versatility. serve your creamy vanilla pudding in small glass jars or vintage coupe glasses to showcase its silky texture. Garnish with a sprinkle of toasted almond slivers or a dusting of ground cinnamon for a warm contrast.
For a fresh fruit boost, top with vibrant berries, passion fruit pulp, or thinly sliced stone fruits drizzled with a splash of honey. A dollop of freshly whipped cream infused with a hint of vanilla or citrus zest adds an airy lightness, balancing the pudding’s richness beautifully. For a decadent touch, drizzle with rich dark chocolate sauce.
For an indulgent twist, try layering the pudding with crushed biscuits or graham crackers to add a subtle crunch, creating an elegant parfait. These creative serving suggestions provide endless inspiration to make this creamy vanilla pudding your signature dessert for any occasion.
Prep and Cook Time
- Prep Time: 15 minutes
- Cook Time: 15 minutes
- Cooling Time: 3 hours minimum
Yield
- Serves 6 appetizing portions
Difficulty Level
- Medium – Perfect for home cooks ready to elevate their dessert skills
Ingredients
- 2 cups whole milk
- 1 cup heavy cream
- 1 Madagascar Bourbon vanilla bean
- 4 large egg yolks
- ⅓ cup granulated sugar
- 3 tablespoons cornstarch
- Pinch of salt
Instructions
- Split the vanilla bean lengthwise and scrape out the seeds using the back of a knife.Set seeds and pod aside.
- Combine milk, cream, vanilla seeds, and pod in a heavy-bottomed saucepan. Warm over medium-low heat until just below boiling, then remove from heat and discard the pod.
- Whisk egg yolks, sugar, cornstarch, and salt in a bowl until mixture is light and smooth.
- TEMPER: Slowly pour about half of the warm milk mixture into the egg yolk mixture while whisking continuously.
- Return mixture to saucepan and cook over low heat, stirring constantly until thickened and smooth.
- Strain the pudding through a fine mesh sieve into a bowl.
- Press plastic wrap directly onto the pudding surface and chill for at least 3 hours.
- Serve chilled with your favorite toppings and garnishes.
Tips for Success
- Always temper your eggs to prevent scrambling and achieve silky pudding.
- Spoil-proof your pudding by stirring with a silicone spatula for gentle, even cooking.
- Chilling overnight enhances flavor and texture-perfect for advance preparation.
- Substitute half-and-half for cream to reduce fat without compromising creaminess.
- Try infusing the milk with a cinnamon stick or cardamom pod alongside the vanilla for an aromatic twist.
Serving Suggestions
Present this sublime vanilla pudding in individual glass ramekins or vintage dessert dishes. Consider a garnish of fresh berries and a sprig of mint for pops of color and freshness. For a sophisticated touch, sprinkle with edible flowers or a few shavings of premium dark chocolate. Alternatively,build a layered parfait with alternating pudding,crushed buttery biscuits,and fresh fruit for visual appeal and delightful texture contrasts.

| Nutrient | Per Serving |
|---|---|
| Calories | 230 kcal |
| Protein | 6 g |
| Carbohydrates | 28 g |
| Fat | 10 g |
For more delightful custard-based recipes,check out our Classic Crème Brûlée to expand your dessert repertoire.
Q&A
Q&A: Creamy Delight – How to Make Homemade Vanilla Pudding
Q1: What makes homemade vanilla pudding different from store-bought versions?
A1: Homemade vanilla pudding is a party of freshness and control. Unlike pre-packaged mixes, homemade pudding uses real ingredients-fresh milk, cream, vanilla beans or extract, and eggs or cornstarch-resulting in a richer, creamier texture and a vibrant, natural flavor that dances on your palate. Plus, it lets you tailor sweetness and creaminess to your liking.
Q2: What are the essential ingredients for making classic vanilla pudding?
A2: At its heart, classic vanilla pudding relies on milk, sugar, a thickening agent (usually egg yolks or cornstarch), salt, and vanilla. Using whole milk or a combination of milk and cream ensures that luscious, velvety mouthfeel. The vanilla can come from pure extract or,for a more aromatic touch,real vanilla beans scraped right into the custard.
Q3: how do I prevent my pudding from curdling or becoming lumpy?
A3: The secret lies in gentle, patient cooking and constant stirring! Slow heating over medium-low heat prevents the eggs from scrambling and allows the starch to thicken evenly. Whisk continually and don’t rush the process-quick temperature spikes or neglect can lead to lumps. If you’re using eggs, temper them by gradually mixing hot milk into the yolks before returning everything to the pot.
Q4: Can I customize the flavor of my vanilla pudding?
A4: Absolutely! Vanilla is a classic base, but it’s also a canvas. Consider adding a pinch of cinnamon, a splash of bourbon, or a hint of citrus zest to elevate the flavor. For an added twist, swirl in melted chocolate or fresh berries once the pudding has set. The possibilities are limited only by your imagination.
Q5: How long should I chill homemade vanilla pudding before serving?
A5: Patience pays off! Let your pudding chill in the refrigerator for at least 2 to 3 hours. This resting time allows it to firm up beautifully, turning into that luscious, creamy delight you’re craving. If you cover it directly with plastic wrap pressed onto the surface, you’ll prevent a skin from forming and keep your pudding silky smooth.
Q6: What is the best way to serve vanilla pudding?
A6: Vanilla pudding is versatile-serve it straight up in elegant glass cups sprinkled with fresh berries and a mint leaf for a simple yet stunning dessert. Or layer it with crushed cookies and whipped cream for an indulgent parfait.It’s equally delightful warm, spooned over fruit cobbler or drizzled with caramel for an extra touch of decadence.
Q7: Can vanilla pudding be made vegan or dairy-free?
A7: Yes! Swap dairy milk for almond, coconut, or oat milk, and replace eggs or cornstarch with plant-based thickeners like arrowroot powder or agar agar. Vanilla beans and vanilla extract remain the flavor stars. Keep in mind that texture may differ slightly, but with a few tweaks, you can still achieve a creamy, dreamy pudding.
Q8: How long does homemade vanilla pudding keep?
A8: Store your pudding in an airtight container in the refrigerator, and it will stay fresh for up to 3 to 4 days. Before serving,give it a gentle stir to restore that silky consistency,as some settling might occur. homemade pudding rarely lasts that long, though-it’s usually devoured well before!
Embark on your homemade vanilla pudding adventure armed with these insights, and you’ll soon be whisking up creamy delights that charm every taste bud. remember: the magic’s in the simplicity, the patience, and the love stirred into each spoonful.
Insights and Conclusions
Whipping up your own creamy delight in the form of homemade vanilla pudding is more than just a recipe-it’s a rewarding journey into the heart of comfort and flavor. With simple ingredients and a touch of patience, you transform everyday pantry staples into a luscious dessert that’s both timeless and irresistibly satisfying. Whether enjoyed solo, topped with fresh fruit, or layered into a decadent parfait, this classic vanilla pudding invites you to savor the sweetness of homemade goodness. So next time dessert calls,skip the store-bought aisle and embrace the charm of crafting your own creamy masterpiece-because nothing tastes quite as delightful as pudding made with a pinch of love and a dollop of care.