There’s something magical about focaccia-the way its golden crust crackles as you tear a piece, revealing a tender, airy crumb infused wiht fragrant herbs and a drizzle of olive oil. But what if you could enjoy this beloved Italian bread without the gluten, and turn it into a canvas for edible art? Welcome to the delightful world of gluten-free focaccia art, where baking meets creativity in the simplest, most satisfying way.This guide will walk you through easy, approachable steps to craft gorgeous gluten-free focaccias that are as lovely to behold as they are flavorful to eat-no fancy techniques or hard-to-find ingredients required. Whether you’re a seasoned baker or a curious beginner, prepare to transform humble dough into masterpieces that celebrate both flavor and imagination.
Crafting Easy Gluten-Free Focaccia Art: A Simple Guide
Crafting easy gluten-free focaccia art is a rewarding journey that blends the rustic charm of Italian baking with the vibrant creativity of decorative toppings. As a longtime lover of focaccia, I found mastering gluten-free versions to be both challenging and liberating-each loaf a blank canvas inviting you to explore exquisite textures and stunning visuals without the constraints of gluten.
Prep and Cook Time
- Preparation: 20 minutes
- Proofing: 1 hour 30 minutes
- Baking: 25 minutes
- Total Time: 2 hours 15 minutes
Yield
One 9×13-inch focaccia, serving 6-8 people.
Difficulty Level
Easy to Medium – Suitable for adventurous home bakers willing to explore gluten-free flour blends and dough techniques.
Ingredients
- 2 cups gluten-free all-purpose flour blend (ensure it contains xanthan gum, or add 1 tsp separately)
- 1 tsp instant yeast
- 1 tsp fine sea salt
- 1 tbsp sugar
- 1 1/4 cups lukewarm water (about 95°F/35°C)
- 1/4 cup extra virgin olive oil (plus extra for drizzling and pan)
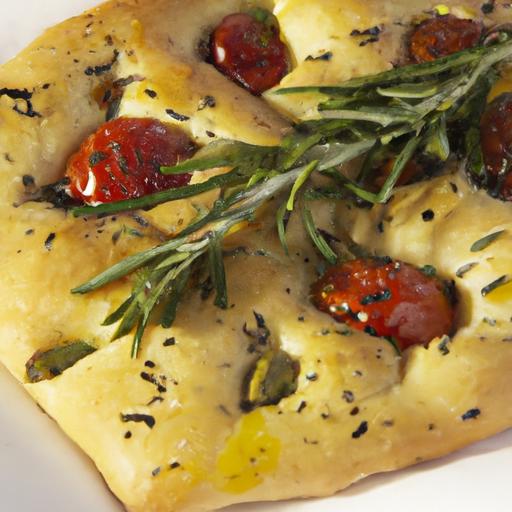
- Fresh rosemary sprigs and flaky sea salt for topping
- Optional toppings: cherry tomatoes, kalamata olives, thinly sliced red onions, edible flowers
Instructions
- Activate the yeast: In a large bowl, whisk lukewarm water, sugar, and instant yeast gently. Let sit for 5-7 minutes until foamy to ensure yeast is active.
- Combine dry ingredients: In another bowl, mix the gluten-free flour blend and salt evenly. If your blend lacks xanthan gum, add it now to create elasticity.
- Mix dough: add dry ingredients and 1/4 cup olive oil to the yeast mixture. stir with a spatula until a wet, sticky dough forms. If dough feels too stiff, add water, 1 tablespoon at a time. The dough shoudl be moist but not runny.
- First proof: Cover the bowl tightly with plastic wrap or a damp kitchen towel. Let rise in a warm place for 1 hour or until it has noticeably puffed and shows bubbles on the surface.
- Prepare pan: Generously oil a 9×13-inch sheet pan with olive oil to prevent sticking and to infuse the base with flavor.
- Transfer dough: Using oiled hands or a spatula, scrape the dough gently into the pan. Avoid kneading here to maintain air pockets formed during proofing.
- Dimpling and topping: Drizzle with 1-2 tablespoons olive oil. With damp fingers, lightly press dimples into the dough. Decorate by gently pressing fresh rosemary, cherry tomatoes, and olives into these dimples. Finish with flaky sea salt for visual contrast and flavor.
- Second proof: Cover again and let rest for 20-30 minutes-the dough will spread to fill the pan beautifully.
- Bake: Preheat the oven to 425°F (220°C). Bake the focaccia on the middle rack for 22-25 minutes until golden brown and crispy on top. The edges should pull away slightly from the pan.
- Cool and serve: Remove from oven, let cool slightly in pan for 10 minutes. Drizzle with a finishing splash of high-quality olive oil before slicing.
Tips for Success
- Flour blend matters: Gluten-free flour blends with rice flour, tapioca starch, and potato starch mimic the airy texture of wheat-based focaccia better. including xanthan gum or psyllium husk enhances chewiness and structure.
- Hydration is key: The dough requires more water than traditional recipes. don’t be tempted to add too much flour-aim for a sticky, wet dough to encourage a light crumb.
- Handle with care: Avoid overworking the dough post-proofing to keep those delicate air pockets intact.
- Creative toppings: Experiment with complementary herbs like thyme or oregano, or add color with roasted garlic cloves or edible flower petals for artisanal presentation.
- Make-ahead: Prepare the dough the night before, storing it covered in the fridge during its first proof. Bring to room temperature and continue as instructed for a fresher flavor.
- Troubleshooting: If your focaccia is dense, try increasing the hydration by 10-15%. Insufficient proofing time is often the culprit behind lackluster rise.
Serving Suggestions
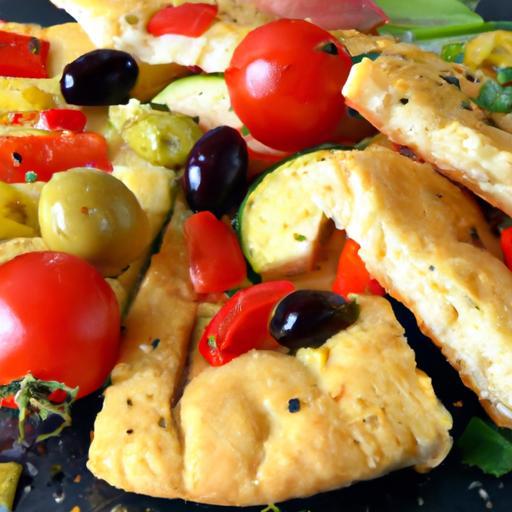
Serve your gluten-free focaccia warm, brushed lightly with olive oil and sprinkled with flaky sea salt. Pair it with a fragrant herb-infused olive oil or balsamic reduction for dipping. For a rustic antipasto board, accompany with marinated olives, prosciutto, and soft cheeses like burrata or ricotta. Garnish with fresh basil leaves or microgreens for a pop of color that elevates the bread into an edible artwork.
| Nutritional Information (per serving) | Amount |
|---|---|
| Calories | 210 kcal |
| Protein | 4 g |
| Carbohydrates | 26 g |
| Fat | 10 g |
Explore more gluten-free baking tips here to deepen your mastery of artisan doughs. For science-backed insights on gluten-free flours and hydration, visit Celiac Disease Foundation’s gluten-free resources.

Q&A
Q&A: Crafting Easy Gluten-Free Focaccia Art – A Simple Guide
Q1: What makes focaccia a perfect canvas for gluten-free artistry?
A1: Focaccia’s soft, pillowy texture and golden crust create an inviting base that’s both functional and beautiful. when gluten-free, it still offers the perfect balance of fluffiness and structure, making it ideal for imprinting artistic patterns, placing vibrant toppings, or brushing with herbaceous oils-turning simple bread into edible art.
Q2: Is gluten-free focaccia difficult to make compared to the traditional version?
A2: Not at all! Thanks to modern gluten-free flours and clever binders like xanthan gum or psyllium husk, you can achieve a tender, airy focaccia without the gluten struggle. The key is to follow a straightforward recipe and give the dough enough time to rise, capturing that classic focaccia spirit in every bite.
Q3: What ingredients are essential for crafting gluten-free focaccia?
A3: At its heart, you need a good gluten-free flour blend, yeast, warm water, olive oil, salt, and a touch of sweetness like honey or sugar to activate the yeast.adding herbs like rosemary or thyme not only enhances flavor but sets the stage for your visual masterpiece.
Q4: How do I create beautiful designs on my focaccia without gluten’s elasticity?
A4: Patience is your artist’s brush! After the first rise, gently press dimples into the dough with your fingertips-don’t worry if they don’t spring back quickly; gluten-free dough is more delicate. Than, thoughtfully arrange toppings like cherry tomatoes, olives, fresh herbs, or even edible flowers to paint your focaccia canvas.
Q5: Can I incorporate natural colors and patterns to elevate my gluten-free focaccia art?
A5: Absolutely. Use vibrant vegetables like purple onions,sun-dried tomatoes,or roasted beets for pops of color. Swirls of pesto or beetroot purée add bold stripes or marbling effects. These natural “paints” not only beautify your bread but infuse it with rich, complementary flavors.
Q6: What’s the best way to bake gluten-free focaccia to achieve a crispy crust and soft interior?
A6: Bake in a well-oiled baking tray preheated in the oven to around 425°F (220°C), giving the dough a swift blast of heat that crisps the edges.Brush the top liberally with olive oil before baking, then halfway through, consider a light mist of water or a sprinkle of coarse sea salt for added texture and shine.
Q7: How long can gluten-free focaccia art be stored without losing its charm?
A7: Fresh is best! Enjoy your focaccia within 1-2 days for optimal flavor and texture. To preserve your artistic efforts,store wrapped in a clean kitchen towel at room temperature. Reheat gently to revive softness without sacrificing your delicious design.
Q8: Any final tips for gluten-free focaccia beginners eager to impress?
A8: Embrace imperfection-it’s part of the charm! Experiment joyfully with toppings and textures,keep your dough hydrated,and don’t rush the rise. With every bake, your confidence-and your edible art-will grow. Most importantly, savor the process as much as the delightful, gluten-free masterpiece you create.
Future Outlook
As you embark on your gluten-free focaccia art journey, remember that simplicity and creativity go hand in hand. With just a handful of basic ingredients and a sprinkle of imagination, you can transform a humble dough into a canvas of edible beauty-each bite bursting with flavor and personality. Whether you prefer rustic charm or intricate patterns, this easy guide empowers you to craft stunning focaccia that’s as kind to your palate as it is indeed to your gluten-free lifestyle. So preheat that oven, gather your favorite toppings, and let your artistic instincts rise alongside your dough-becuase delicious art is just a bake away.