There’s something undeniably enchanting about a cloud of perfectly whipped foam crowning your morning latte or a velvety mousse that melts effortlessly on the tongue. Behind these delightful textures lies a simple yet frequently enough underestimated kitchen companion: the hand blender. In “Mastering Foam Magic: Hand Blender Techniques Unveiled,” we dive deep into the art and science of creating luscious foams and froths with precision and ease. Whether you’re a curious home cook or an aspiring barista, this guide will transform how you wield your hand blender-turning everyday ingredients into airy masterpieces and bringing a touch of magic to every dish and drink.
Mastering Foam Magic is not just about frothing milk – it’s about unlocking the delicate science and art behind that perfect, creamy texture that elevates your homemade coffee drinks to café-grade elegance. Whether you’re a casual coffee lover or an aspiring home barista, understanding how to use your hand blender effectively can transform your everyday cup into a velvety masterpiece with irresistible foam.
Prep and Cook Time
- Preparation: 5 minutes
- Frothing Time: 2-3 minutes
- Total Time: 8 minutes
Yield
serves: Froth enough milk for 1-2 cups (about 8 oz foam)
Difficulty Level
Easy to Medium – perfect for beginners eager to gain barista-level confidence
Ingredients
- 1 cup whole milk (for best microfoam; alternatives below)
- Optional: 1 tbsp cold heavy cream (for extra richness)
- Sweetener (optional): 1 tsp vanilla syrup or honey
- Equipment: Hand blender with whisk attachment
Step-by-Step Techniques to Achieve Barista-Level Foam at Home
- Chill your milk and container. For smooth,stable foam,cold milk helps create tiny,consistent bubbles.Fill a clean, tall container with 1 cup of milk, leaving room for expansion.
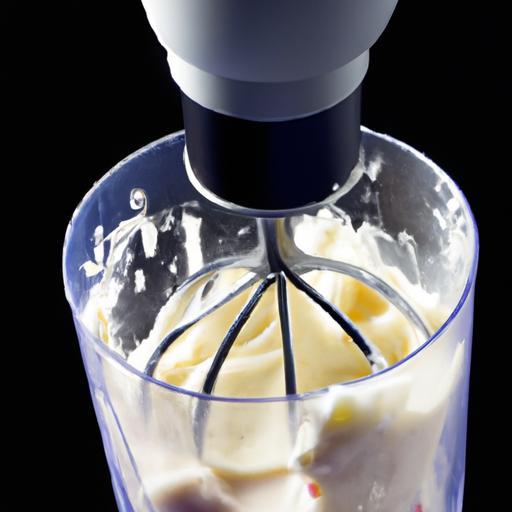
- Choose the whisk attachment. This is key to Mastering Foam Magic as the whisk agitates air into the liquid, creating delicate microbubbles essential for creamy froth.
- Submerge the whisk,turn on high speed. Hold the hand blender steady, just beneath the surface of the milk to trap air, moving it slowly as foam begins forming.
- Whisk for 1-2 minutes. Stop intermittently to check texture-a glossy, velvety consistency with no large bubbles is your goal.
- Warm gently if preferred. Post-frothing, warm your milk in the microwave for 15-20 seconds if you desire hot foam – avoid overheating to prevent breaking down the foam’s structure.
- Stop the blender before removing it from milk. This prevents hot milk from splattering and ensures a smooth finish.
Troubleshooting Common Foam Issues and Expert Tips for Consistency
- Foam too bubbly or large bubbles? Use the whisk attachment fully submerged and move the blender slower-large bubbles mean too much air trapped quickly.
- Soggy or watery foam? Avoid overheating your milk before frothing, and ensure your milk is fresh and cold.
- Foam not forming? Check your milk choice – skim and low-fat milk foam differently than whole milk; adding a splash of cream can help.
- Foam dissipates quickly? Use fresh whole milk and froth immediately before serving; also, a metal container can definitely help retain cold temperature better than plastic.
Chef’s Notes
- Try oat or almond milk, but note that their proteins stabilize foam differently, often requiring a longer froth time and sometimes a stabilizing additive.
- For a flavored twist, add a drop of vanilla extract or cinnamon powder before frothing.
- Regular cleaning of your whisk attachment prevents milk residue buildup, which can affect froth quality.
- Practice makes perfect: small adjustments in speed, angle, and container size will help you perfect your technique quickly.
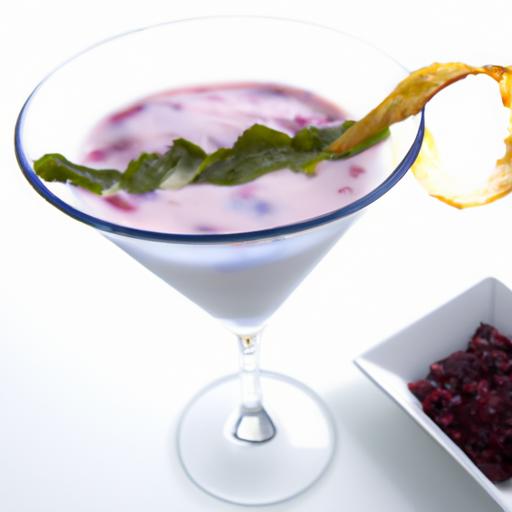
Serving Suggestions
Pour your luscious foam over freshly brewed espresso for a classic cappuccino or swirl gently into hot chocolate for a decadent finish. Garnish with a light dusting of cocoa or cinnamon, or sprinkle finely grated nutmeg for warmth. for an Instagram-worthy touch,use a spoon to layer the dense foam atop cold brew coffee with ice,and add a sprig of fresh mint for visual appeal.

| Nutrient | Per Serving (1 cup) |
|---|---|
| Calories | 150 kcal |
| Protein | 8 g |
| Carbohydrates | 12 g |
| Fat | 8 g |
For more about milk alternatives and their foaming properties, visit Specialty Coffee Association. Interested in exploring hand blender care and varied culinary uses? Check out our extensive guide on hand blender maintenance.
Q&A
Q&A: Mastering Foam Magic: Hand Blender Techniques Unveiled
Q1: What makes hand blenders ideal for creating perfect foam?
A1: Hand blenders are the unsung heroes of kitchen alchemy when it comes to frothy creations. their compact design and powerful motor allow for rapid aeration, whipping air seamlessly into liquids. Unlike bulky countertop mixers, hand blenders offer precision and control, enabling you to craft delicate foams-from silky milk froth to airy meringues-with ease.
Q2: Which ingredients work best for foam creation using a hand blender?
A2: The magic usually starts with liquids rich in proteins or fats, such as whole milk, cream, egg whites, or even certain plant-based milks like oat or soy. These components trap air effectively, forming stable bubbles. Additionally, adding a touch of sugar or acid (like lemon juice or cream of tartar in egg whites) can enhance foam stability, giving your creation both volume and longevity.
Q3: What are the essential hand blender techniques to master foam-making?
A3: Technique is everything in foam wizardry! Begin by immersing the blender’s whisk or blade just below the liquid surface to incorporate air rather than just chopping.Use pulsating motions or lift the blender gradually to introduce bubbles gently.Speed control is crucial-start slow to mix ingredients, then ramp up for aeration. Timing matters too: overbeating can collapse delicate foams, so watch for glossy peaks or soft billows as your cue.Q4: How can I prevent my foam from deflating quickly?
A4: stability is the secret to lasting foam. To keep your froth from deflating prematurely, ensure your ingredients are fresh and chilled-cold temps help trap air better. Avoid overwhipping, which breaks down the foam’s structure. Incorporating stabilizers like gelatin, agar-agar, or a pinch of cornstarch can extend shelf life. Lastly, serve foam immediately or store it gently in a chilled container to preserve its airy charm.
Q5: Can hand blender foam techniques be used beyond the kitchen?
A5: Absolutely! foam mastery transcends culinary borders. From crafting lush body scrubs to whipping up light, frothy paints or DIY beauty masks, the hand blender’s foam power injects creativity into everyday projects. Essentially,any liquid that can trap air is your playground-just adjust technique and ingredients for astonishing textures beyond food.
Whether you’re a home cook or a kitchen conjurer, understanding and harnessing the secrets of hand blender foam techniques opens a world of airy wonders. Now, grab your hand blender and let the foam magic begin!
In Summary
As you embark on your journey to master the art of foam magic, remember that every bubble tells a story-of texture, flavor, and technique brought to life by your hand blender’s rhythmic dance. With these unveiled techniques at your fingertips, you’re no longer just blending ingredients; you’re crafting culinary clouds that elevate ordinary dishes into unusual experiences. So, embrace the frothy possibilities, experiment boldly, and let your hand blender transform simple liquids into the airy, velvety masterpieces that delight both palate and eye.The secret to foam perfection is now in your hands-whisk, blend, and enchant!