In the world of culinary artistry, few ingredients inspire as much wonder and versatility as phyllo dough. Its delicate, paper-thin layers, crisped to golden perfection, are the secret behind countless beloved pastries and savory dishes. Yet for those navigating the intricate path of gluten-free baking, phyllo frequently enough feels like an elusive treasure-fragile, tricky, and seemingly out of reach. Welcome to Crafting Delight: The Ultimate Guide to Gluten-Free Phyllo Dough, where we unravel the mysteries and master the techniques that make gluten-free phyllo not just possible, but delightfully achievable. Whether you’re a seasoned baker seeking to expand your repertoire or a curious novice eager to dive into new flavors, this guide promises to transform your kitchen into a haven of flaky, flavorful creations without compromise. Join us as we blend culinary science, time-honored traditions, and innovative flour blends to craft gluten-free phyllo dough that’s every bit as enchanting as the original.
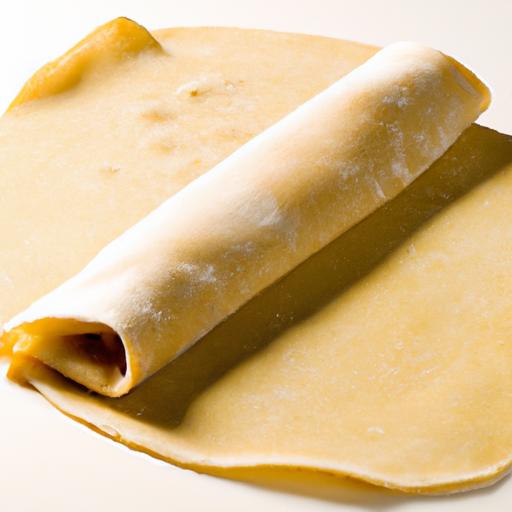
Crafting Delight: The Ultimate Guide to Gluten-Free phyllo Dough begins with understanding the delicate balance needed to perfect the texture and adaptability that makes phyllo dough truly irresistible. Harnessing the magic of gluten-free flours and precise handling techniques can transform even the most fragile dough sheets into beautifully flaky, paper-thin layers that crisp to perfection. Whether you’re drawn to its Middle Eastern roots or enchanted by the stunning layers in classic Greek baklava, mastering gluten-free phyllo opens a world of appetizing possibilities for everyone craving light yet crunchy pastry excellence.
Prep and Cook Time
- Planning: 1 hour 30 minutes (includes resting time)
- Cooking: 20-30 minutes
Yield
- Approximately 20 sheets of gluten-free phyllo dough, suitable for 4-6 servings
Difficulty Level
- Intermediate: Requires patience and careful handling but accessible to confident home bakers
Ingredients
- 1 cup gluten-free all-purpose flour blend (preferably one with xanthan gum included)
- 1/2 cup brown rice flour, sifted
- 1/4 cup tapioca starch
- 1 tbsp potato starch
- 1 tsp xanthan gum (if not included in your flour blend)
- 1/2 tsp fine sea salt
- 2 tbsp olive oil or melted vegetable oil
- 3/4 cup warm water (adjust as needed for pliability)
- 1 large egg white (optional for added elasticity)
- Extra gluten-free flour blend for dusting
Instructions
- mix Dry Ingredients: In a large bowl, whisk together the gluten-free all-purpose flour, brown rice flour, tapioca starch, potato starch, xanthan gum, and salt until well combined.
- Add Wet Ingredients: Create a well in the centre and add the olive oil,warm water gradually,and egg white. Stir with a fork or wooden spoon until a shaggy dough forms. If the dough feels sticky, add a touch more gluten-free flour; if too dry, add water teaspoon by teaspoon.
- Knead Gently: Turn the dough onto a lightly floured surface and knead for 3-4 minutes until smooth and elastic. Avoid over-kneading to prevent toughness.
- Rest the Dough: Cover the dough with a damp towel or plastic wrap and let it rest for at least 30 minutes to relax the starches, which enhances flexibility.
- Divide and roll: Cut the dough into 20 equal portions. Working on a generously floured surface, roll each portion into a thin, almost translucent sheet, approximately 8×10 inches.Use a long rolling pin with gentle, even pressure to avoid tearing.
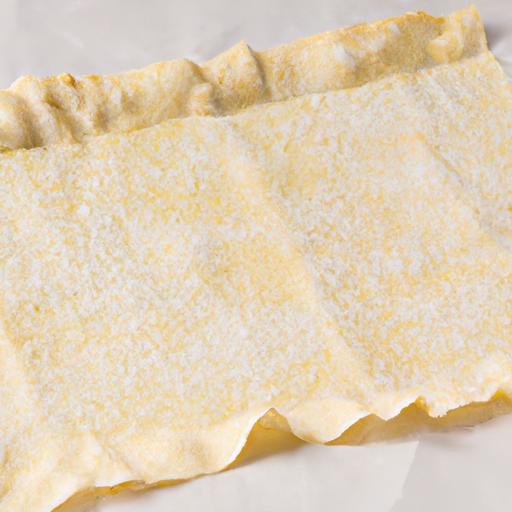
- Handle with Care: Place rolled sheets on parchment paper, dusting each with gluten-free flour to prevent sticking.Stack carefully, and cover with a damp cloth to maintain pliability while you work.
- Use Instantly or Store: If not using right away, wrap stacks tightly in plastic wrap and refrigerate for up to 24 hours.For freezing, separate sheets with parchment and freeze in airtight bags up to 1 month.
- Bake to Crisp Perfection: When ready to bake, brush sheets generously with melted butter or oil between layers to achieve those iconic flaky, golden layers. Bake according to your recipe’s instructions, typically at 350°F (175°C) for 20-30 minutes until crisp and golden.
Tips for Success
- Flour Selection: Combining starches like tapioca and potato prevents brittleness and adds stretch,while brown rice flour lends structure without heaviness.
- Resting Makes Perfect: Don’t skip resting; it allows the dough to hydrate fully and relax for easy rolling.
- Humidity Aids Flexibility: Keep your workspace slightly humid to avoid cracking.Cover rolled sheets with damp cloth and work quickly.
- Use a Long Rolling Pin: This provides uniform pressure vital for paper-thin layers.
- Egg White Optional: Adds extra binding for elasticity-great for delicate handling but can be omitted for vegan versions.
- Butter Brushing: For ultimate crisp and flavor, brush each layer with clarified butter or melted coconut oil rather than neutral oil.
Serving Suggestions
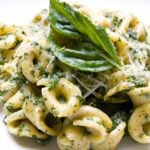
Gluten-free phyllo dough is a canvas for both sweet and savory delights. Build vibrant vegetable spanakopita, layering spinach, feta, and fresh herbs between your homemade sheets, or try a honey-drizzled baklava bursting with chopped pistachios and walnuts. For a modern twist,fold in spiced pumpkin and goat cheese for fall-inspired turnovers,or roll with herbed mushrooms for elegant appetizers. Garnish finished dishes with fresh mint, toasted nuts, or a dusting of powdered sugar to highlight the contrast of crisp and tender textures.

| Nutrient | Per Sheet (Estimated) |
|---|---|
| Calories | 45 kcal |
| Protein | 1.2 g |
| Carbohydrates | 9 g |
| Fat | 0.8 g |
For more inspiration on gluten-free baking, check out our Gluten-Free Pastry Base Recipes. To deepen your understanding of gluten-free flours, visit this resource from Gluten-Free Cooking.
Q&A
Q&A: Crafting Delight – The Ultimate Guide to Gluten-Free Phyllo Dough
Q1: What makes gluten-free phyllo dough different from traditional phyllo dough?
A1: Traditional phyllo dough is typically made from wheat flour, which contains gluten - the protein responsible for its characteristic elasticity and ultra-thin stretchiness. Gluten-free phyllo dough, conversely, swaps out wheat for choice flours (like rice, tapioca, or chickpea flour) and frequently enough relies on a clever blend of starches and gums to mimic that delicate, paper-thin texture. The challenge? Achieving that signature crispness and pliability without gluten’s magical binding properties.
Q2: Why should I consider making gluten-free phyllo dough at home?
A2: store-bought gluten-free phyllo can be tricky to find and even trickier to work with-frequently enough lacking the finesse and flakiness of homemade versions. Crafting your own dough gives you creative control over ingredients, perfecting the balance between tenderness and crunch. Plus, it’s immensely satisfying to roll out those gossamer-thin sheets with your own hands, turning natural, gluten-free flours into a culinary work of art.
Q3: what are the key ingredients in gluten-free phyllo dough?
A3: The magic mix frequently enough includes a gluten-free flour blend (think rice flour, sorghum, or oat flour), starches like tapioca or cornstarch for crispness, xanthan gum or guar gum to act as gluten stand-ins, a touch of olive oil for pliability, warm water for hydration, and a pinch of salt to enhance flavor. Sometiems an egg white is added to improve elasticity, but vegans can skip this with additional binders.
Q4: How do I roll out gluten-free phyllo dough without it tearing?
A4: Patience and precision are your best friends hear. Gluten-free dough tends to be more fragile, so start by rolling a small ball out with gentle, even pressure-using plenty of rice flour or cornstarch to keep it from sticking. Work on a lightly floured surface,and don’t rush. Resting the dough between roll-outs can help relax it, making it easier to stretch ultra-thin sheets without breakage.
Q5: Are there any secret tips for getting that perfect flaky texture?
A5: Absolutely! Layering is key: brush each sheet generously with melted butter or olive oil before adding the next. This fat infusion ensures crisp, golden layers once baked. Also, keep the dough covered with a damp cloth while working to prevent drying out. Baking on a preheated tray or stone ensures uniform heat, contributing to the sought-after crispness.
Q6: Can gluten-free phyllo dough be frozen?
A6: Yes! To preserve your labor of love, gently separate the sheets with parchment paper and stack them in an airtight container or zip-lock bag. Freeze flat to prevent warping. When you’re ready to bake, thaw slowly in the fridge and keep covered with a damp cloth until use to maintain moisture and flexibility.
Q7: what are some delicious recipes I can try with gluten-free phyllo dough?
A7: The possibilities are endless-think classic baklava with layers of nuts and honey, crispy spanakopita filled with spinach and feta, or a delicate apple strudel dusted with cinnamon. The gluten-free dough adapts beautifully to both savory and sweet fillings, inviting you to experiment and delight your taste buds with safe, flaky indulgence.Q8: Any final advice for beginners diving into gluten-free phyllo dough crafting?
A8: Embrace experimentation and don’t be discouraged by a few torn sheets. Every roll, fold, and brush brings you closer to perfection. keep your workspace lightly floured,your dough covered,and your spirits high. With practice, you’ll craft phyllo dough so thin and flaky that discerning palates won’t believe it’s gluten-free.Now, let the culinary adventure begin!
Final Thoughts
as you embark on your journey to master gluten-free phyllo dough, remember that patience and practice are your finest ingredients. This delicate, versatile dough-once considered intimidating-can transform your culinary creations into light, flaky masterpieces that everyone can enjoy.With each crisp layer you craft, you’re not just baking; you’re weaving tradition with innovation, proving that gluten-free doesn’t mean flavor-free. So roll out your creativity, embrace the process, and let your kitchen become a haven where gluten-free delights come to life, one buttery, crackling sheet at a time.