There’s something undeniably satisfying about biting into a golden, perfectly crispy roasted chicken-where the skin crackles beneath the fork and the meat inside remains tender and juicy. Achieving that ideal balance of texture and flavour might seem like a culinary mystery reserved for seasoned chefs, but with the right techniques, anyone can master it at home. In this step-by-step guide, we’ll unravel the secrets behind roasting chicken to crisp, savory perfection, transforming a humble bird into the centerpiece of a memorable meal. Get ready to elevate your roasting game and impress your family and friends with a dinner that’s as delightful to the eyes as it is to the palate.
Perfectly Crispy Roasted Chicken: Choosing and Preparing the Ideal Bird
Perfectly crispy roasted chicken is more than just a simple meal; its a festivity of texture, aroma, and deep, irresistible flavor. Achieving that coveted crunch with juicy, tender meat starts with selecting the right chicken and preparing it thoughtfully. Whether you’re roasting for a family dinner or impressing guests, the secret lies in understanding your bird and mastering the techniques for crispiness and flavor.
Prep and Cook Time
- Planning: 20 minutes (plus 4 to 12 hours marinating time)
- Cooking: 1 hour 15 minutes to 1 hour 30 minutes (depending on bird size)
Yield
Serves 4 to 6 people
Difficulty Level
Medium – Ideal for home cooks ready to elevate their roasting game
Ingredients
- 1 whole chicken, 4 to 5 pounds, preferably organic or free-range
- 3 tablespoons olive oil or melted butter (for basting)
- 1 tablespoon kosher salt, for dry brining
- 1 teaspoon freshly ground black pepper
- 1 teaspoon smoked paprika
- 1 teaspoon garlic powder
- 1 teaspoon onion powder
- Juice of 1 lemon
- 3 sprigs fresh rosemary, roughly chopped
- 3 sprigs fresh thyme
- 3 garlic cloves, smashed
- optional: 1 teaspoon cayenne pepper for subtle heat
Instructions
- Select your chicken carefully. Look for a bird with firm, unblemished skin and even fat distribution. A slightly older bird (not too young, not too old) tends to produce meat with better flavor and texture, ideal for perfectly crispy roasted chicken.
- Dry brine the chicken. Pat the chicken dry with paper towels. Sprinkle the kosher salt evenly over the entire surface, including under the skin where possible. This step is key to drawing out moisture to yield that irresistibly crisp skin. Refrigerate uncovered for at least 4 hours, ideally overnight.
- Prepare the marinade and seasoning. In a small bowl, combine olive oil, lemon juice, paprika, garlic powder, onion powder, black pepper, and your chosen herbs. This aromatic blend enhances depth without overpowering the natural chicken flavor.
- Pat chicken dry again before applying marinade. Massage the marinade all over the chicken, including inside the cavity. Insert the smashed garlic cloves and fresh herbs inside the cavity for an infused aroma during roasting.
- Preheat your oven to 425°F (220°C). Position a rack inside a roasting pan to allow air circulation under the bird. This setup is essential to crisp the skin evenly.
- roast the chicken breast side up. Place the bird on the rack, ensuring legs are tied (trussed) to avoid uneven cooking.Roast for 20 minutes at high heat to crisp the skin initially.
- Lower the oven temperature to 375°F (190°C). Continue roasting for 45-60 minutes. Baste every 15 minutes with the pan juices and olive oil or butter to lock in moisture.
- Check internal temperature. Use a meat thermometer inserted in the thickest part of the thigh (without touching bone). Once it reads 165°F (74°C),your chicken is perfectly cooked and juicy inside.
- Rest the chicken. Remove from the oven and tent loosely with foil. Let it rest 15 minutes before carving-this redistributes juices, ensuring every bite is moist and satisfying.
Chef’s Notes: Tips for Success
- For extra-crispy skin, consider patting the chicken dry again just before roasting and use a high smoke point oil like grapeseed or avocado oil in your marinade.
- Trussing is crucial to maintain even cooking and help keep the juicy breast tender.
- Marinate the chicken overnight or use the dry brine method for at least 4 hours-these steps intensely enhance flavor and texture and are essential to perfectly crispy roasted chicken.
- If your skin isn’t crispy enough, finish the chicken under the broiler for 2-3 minutes, watching carefully to avoid burning.
- Substitutions: Fresh herbs can be swapped for dried (use one-third the amount), and lemon juice can be replaced with a splash of white wine vinegar for brightness.
Serving Suggestions
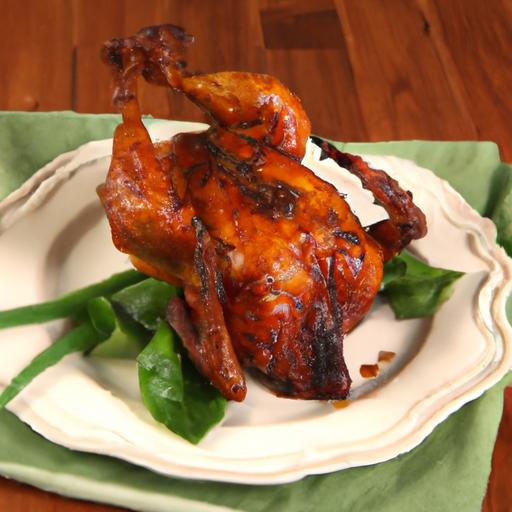
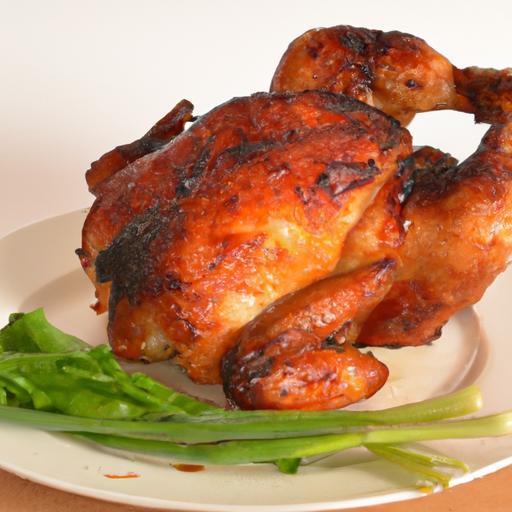
Serve the chicken carved on a warm platter, garnished with fresh herbs and thin lemon slices for visual appeal. This dish pairs beautifully with roasted root vegetables, a crisp green salad, or buttery mashed potatoes. Drizzle pan juices or a simple herb-infused gravy over the slices for an added layer of flavor.

| Nutrient | Amount per Serving |
|---|---|
| Calories | 450 kcal |
| Protein | 38 g |
| Carbohydrates | 2 g |
| Fat | 30 g |
For those interested in pairing this recipe with classic sides or exploring other poultry techniques, visit our Ultimate Roasted Poultry Guide. For credible culinary science insights behind meat resting times and heat transfer, check out this Serious Eats science breakdown.
Q&A
Q&A: perfectly Crispy Roasted Chicken – Your Ultimate Step-by-Step Guide
Q1: Why does my roasted chicken skin never get crispy?
A1: The secret to crispy skin lies in moisture control. If the skin is damp when it hits the oven, it steams rather than crisps. Pat your chicken dry with paper towels before seasoning, and let it air-dry in the fridge uncovered for a few hours if possible. This helps the skin dehydrate slightly, setting the stage for that coveted crunch.
Q2: Is oven temperature important for crispy chicken?
A2: Absolutely! High initial heat-around 425°F (220°C)-helps render the fat under the skin quickly, creating crispiness.After about 15-20 minutes, lowering the oven temperature slightly allows the meat to cook evenly without burning the skin. This thermal dance results in golden, crackling perfection.
Q3: Should I use oil or butter on the chicken skin?
A3: Both have their merits. Oil has a higher smoke point, ideal for crisping skin without burning, while butter adds rich, nutty flavor but can brown quickly. A tasty trick is to rub the chicken with oil first, then dot with butter halfway through roasting for flavor and extra crispness.
Q4: What role does seasoning play beyond flavor?
A4: Salt is your best friend. Not only does it enhance taste, but it also draws moisture from the skin ahead of cooking, assisting in the drying process that leads to crispiness. For an even crunchier crust, try seasoning the chicken liberally with salt at least an hour before roasting or even overnight.
Q5: How do I avoid dry meat when going for crispy skin?
A5: Patience and temperature control are key. Start high to crisp the skin, then lower the heat to finish cooking gently. Using a meat thermometer ensures you hit the perfect internal temperature-165°F (74°C)-without overcooking. Rest your chicken after roasting to let juices redistribute, keeping the flesh juicy and tender beneath that crispy jacket.
Q6: Can I use a roasting rack to improve crispiness?
A6: yes! Elevating the chicken on a rack allows air to circulate evenly around the bird, preventing soggy spots and promoting uniform crisping. It also helps the fat drip away, making the skin lighter and crunchier.
Q7: Are brining and marinating helpful for crispy skin?
A7: brining hydrates the meat and can improve juiciness, but excess surface moisture may hinder crisping if not properly dried. For best results, after brining, thoroughly pat the chicken dry before roasting. Marinating usually adds flavor but watch for wet marinades that can keep skin damp-dry rubs work better for crispiness.
Q8: How long should I rest the chicken after roasting?
A8: About 10-15 minutes is ideal. Resting allows the juices to redistribute throughout the meat, preventing dryness when you carve. Plus, the skin cools just enough to stay crisp rather than steaming from trapped heat.
Q9: Can I achieve crispy skin with a whole chicken or just parts?
A9: Both! Whole chickens roasted properly can have beautifully crispy skin all over. Chicken parts like thighs and drumsticks, with their higher fat content, often crisp up even more readily. Adjust cooking times accordingly-parts roast faster than whole birds.
Q10: What’s a creative twist to elevate my crispy roasted chicken?
A10: Try infusing your seasoning mix with smoked paprika, garlic powder, and a touch of brown sugar for a caramelized, savory crust. Or brush the skin with a honey and mustard glaze in the last 10 minutes for a glossy, crispy finish bursting with flavor. The possibilities to tailor your crispy masterpiece are endless!
To Wrap It Up
With these simple steps, achieving perfectly crispy roasted chicken is no longer a culinary mystery but a deliciously attainable masterpiece. From the artful seasoning to the precise roasting time, each element plays its part in creating that irresistible golden crust and succulent interior. So next time you crave a dinner that’s both comforting and impressive, remember: perfection is just a roast away. Happy cooking, and may your kitchen be filled with the tantalizing aroma of crispy, savory success!