TherS something undeniably magical about a dollop of whipped cream-light, airy, and decadently smooth. Yet, anyone who’s ever whipped perfection only to watch it collapse knows that the secret to flawless cream lies not just in the beating, but in mastering the art of stabilization. In “Whip It Right: The Secret to Perfectly Stabilized Cream,” we delve beyond the surface of those billowy peaks to uncover the science and techniques that transform fragile fluff into a resilient cloud of indulgence. Whether you’re topping cakes,frosting cupcakes,or crafting elegant desserts,learning to stabilize your whipped cream will elevate your culinary creations from fleeting to fabulous every single time.
Choosing the Ideal Cream for Fluffy Perfection
Whip it right by starting with the perfect cream-a crucial first step toward achieving that cloud-like texture every dessert deserves. Heavy cream or heavy whipping cream with at least 36% fat content is your best ally because the fat molecules trap air and form stable peaks when whipped. Avoid whipping creams labeled as “light” or “whipping cream” with less than 30% fat, as they struggle to hold volume and tend to turn grainy or watery. For an indulgent touch, ultra-pasteurized heavy cream works, but keep in mind it may take a little longer to whip due to processing.
For a richer flavor, choose a fresh, cold cream straight from the fridge-not too old or overly processed. If you prefer dairy alternatives, coconut cream chilled overnight can be whipped, but vegan stabilizers might potentially be necessary for sustained firmness.
Mastering Temperature and Tools for Ultimate Stability
Temperature is the silent hero of fluffy cream perfection. Keep your cream chilled between 35°F and 45°F (2°C-7°C). Fat needs to be cold to solidify properly, which ensures the cream will whip into firm peaks quickly and stay stable.Chill your mixing bowl and beaters in the freezer for 15 minutes before starting-cold metal accelerates whipping and yields a smoother, denser texture.
Use a stand mixer fitted with a whisk attachment for the most effortless and even whipping, tho a handheld electric mixer works just as well. Avoid manual whisks unless you’re prepared for a satisfying arm workout.The goal is to incorporate air evenly and steadily without overworking the cream.
Step by Step Techniques to Whip Cream Like a Pro
- Preparation: Place your cream, bowl, and beaters in the fridge or freezer. Measure out any sweeteners or flavorings you plan to use.
- pour and Begin Slowly: Pour the cold cream into your chilled bowl. Start whipping on low speed to gently aerate the cream.
- Increase Speed Gradually: As the cream begins to thicken (soft peaks stage), increase to medium-high speed. This step ensures stable foam formation.
- Add Sugar and Flavoring: When soft peaks begin to form, add powdered sugar (preferably superfine) and vanilla extract for sweetness and aroma, continuing to whip.
- Watch for the Peaks: Stop whipping as soon as firm peaks form. The cream should be smooth, thick, and hold its shape without slipping off the whisk.
- Avoid overwhipping: Pay close attention-if the cream looks grainy or starts turning buttery, you are overwhipping. Use immediately or gently fold in a little fresh cream to rescue the texture.
Troubleshooting Common Cream Whipping Mistakes
Even the most experienced can face challenges when whipping cream. Here are quick fixes for common pitfalls:
- Cream Won’t Whip: Ensure it’s cold enough; warm cream cannot aerate properly.
- Grainy or Buttery Texture: You’ve whipped past firm peaks. Try folding in a tablespoon of unwhipped cream to loosen or start fresh.
- Runny Cream: Often caused by low-fat cream or improper chilling. Switch to a higher-fat cream and chill thoroughly.
- Flattened or Weakened Peaks: Avoid running the mixer on the highest speed from the start and do not overbeat.
- Inconsistent Texture: Ensure you’re using the same utensil and stirring gently if folding in additional ingredients.
Mastering these steps and understanding the science behind cream’s behavior will empower you to whip it right every time-transforming simple cream into a luscious and stable topping that elevates every dish.

Prep and Cook Time
- Prep Time: 10 minutes (including chilling tools)
- Whipping Time: 5-7 minutes
- Total Time: Approximately 15-20 minutes
Yield
Yields approximately 2 cups of whipped cream,enough to garnish 6-8 servings.
Difficulty Level
Easy to Medium – Requires attention to temperature and timing but accessible for all skill levels.
Ingredients
- 1 cup heavy cream (36% fat or higher), chilled
- 2 tbsp powdered sugar (adjust to taste)
- 1 tsp pure vanilla extract
Instructions
- chill your equipment: Place a metal mixing bowl and whisk or beaters into the freezer for 15 minutes.
- Pour chilled cream: Pour 1 cup of cold heavy cream into the chilled bowl.
- Start whipping: Using a stand or handheld mixer, whip on low speed until the cream starts to thicken (about 1-2 minutes).
- Increase speed: Gradually increase to medium-high and continue whipping until soft peaks form.
- add sugar and vanilla: Sprinkle in 2 tablespoons of powdered sugar and add 1 teaspoon vanilla extract; fold in gently as you continue whipping.
- Whip to firm peaks: Watch closely and stop whipping once firm peaks form-peak tips should hold shape without drooping.
- Serve immediately or store: Use at once or refrigerate in a covered container for up to 24 hours; whisk briefly before serving if needed.
Chef’s Notes
- For a stabilized cream that holds shape longer, gently fold in gelatin or cream cheese.
- powdered sugar not only sweetens but also stabilizes better than granulated sugar.
- If you’re short on time, pre-chill cream in the freezer for 15 minutes before whisking, but don’t let it freeze solid.
- Homemade vanilla bean paste can replace vanilla extract for a more aromatic flavor.
- To make ahead, whip cream slightly less than firm peaks and finish whipping just before serving.
Serving Suggestions
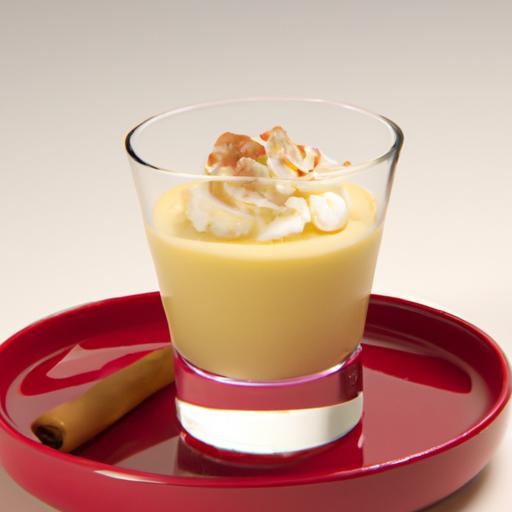
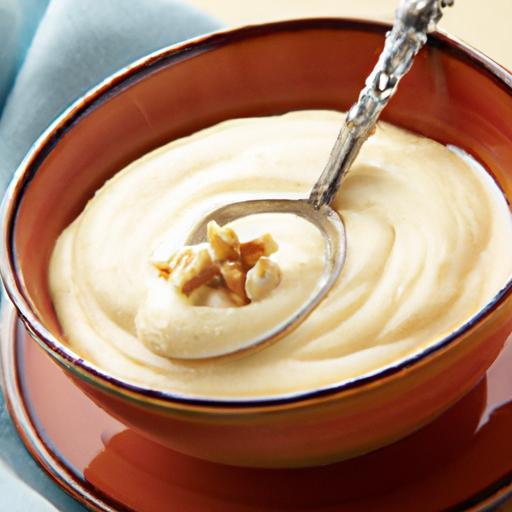
This perfectly stabilized cream is ideal for topping classic pies, spongy cakes, fresh fruit salads, or hot beverages. Dollop elegantly alongside warm chocolate lava cakes or swirl into freshly brewed coffee for a luxurious treat. Garnish with a dusting of cocoa powder, toasted almond flakes, or vibrant fresh berries to add layers of texture and color.
| Nutritional Information (per ½ cup serving) | Calories | Protein | Carbs | Fat |
|---|---|---|---|---|
| Whipped Heavy Cream | 200 | 1.5g | 2g | 21g |
For more tips on working with dairy ingredients, check out our related guide Ultimate Guide to Dairy Baking.
Q&A
Q&A: Whip It Right – The Secret to Perfectly Stabilized Cream
Q1: What exactly is stabilized cream, and why is it crucial?
A: Stabilized cream is whipped cream that holds its shape and texture longer without weeping or melting. It’s the superhero of dessert toppings – ready to withstand time, heat, and movement without losing its fluffy charm. Perfect for cakes, mousses, and fancy drinks, stabilized cream ensures your creations look as stunning as they taste.
Q2: Why doesn’t regular whipped cream hold up well?
A: Regular whipped cream is essentially air trapped in fat. While this fluffy cloud is delightful, it’s delicate.Without support, the air bubbles collapse, and the cream weeps liquid, turning your masterpiece into a soggy disappointment after a short while.
Q3: So, what’s the secret to perfectly stabilized cream?
A: The secret lies in adding a little “bodyguard” to your cream – a stabilizer. Ingredients like gelatin, cornstarch, cream of tartar, or mascarpone act like tiny scaffolds, reinforcing the fat and air network. This keeps your whipped cream firm, fluffy, and picture-perfect for hours.
Q4: How do I add gelatin to stabilize my cream?
A: Bloom powdered gelatin in a splash of cold water-let it soak for a few minutes. Warm it gently until dissolved (don’t boil!). Whip your cold cream to soft peaks, then slowly drizzle in the gelatin while continuing to whip until you reach firm peaks. Voilà: stabilized cream with staying power!
Q5: Are there alternatives to gelatin for vegetarians or vegans?
A: Absolutely! Agar-agar is a plant-based alternative that works similarly but requires different handling (it needs to be boiled before cooling). Other options include commercial stabilizers or using mascarpone cheese or cream cheese as part of your cream base for extra stability without animal-derived gelatin.
Q6: can I stabilize whipped cream ahead of time?
A: Yes! One of the perks of stabilized cream is its resilience. You can prepare it hours or even a day before serving and keep it chilled.Just give it a gentle stir or re-whip briefly if it loosens up.
Q7: Will stabilizing cream affect the flavor or texture?
A: Slightly – but in a good way! Stabilizers add a subtle creaminess or silkiness without overshadowing the natural flavor. The texture becomes a bit denser but still light and airy, giving your desserts extra polish.
Q8: Any tips for achieving the best results?
A: Use cold cream with at least 35% fat for optimal whipping. Chill your bowl and beaters to speed up the process. Add your sweeteners and vanilla early but the stabilizer last, carefully folding or drizzling it in. avoid over-whipping, which can turn cream grainy or into butter.
Q9: Can stabilized cream replace regular whipped cream in every recipe?
A: Mostly yes, but keep in mind that stabilized cream holds better in warmer conditions and for decorative purposes. In recipes where cream is folded into spatula-tender mousses or custards, the extra stiffness might affect texture, so adjust accordingly.
Q10: Any creative uses for stabilized cream beyond desserts?
A: Definitely! Use stabilized cream atop hot beverages without the worry of melting away, pipe it into breakfast parfaits, or dollop it on fresh fruit for picnics. it’s also fantastic for edible garnishes and can be colored or flavored to match themes, making your culinary creativity blossom.
Whipping up perfectly stabilized cream isn’t just a technique - it’s a appetizing art form that transforms your sweet creations from fleeting to fabulous. So grab that whisk, add your secret stabilizer, and whip it right!
Future Outlook
Mastering the art of perfectly stabilized cream is more than just a culinary skill-it’s a delightful journey into the science and finesse behind every luscious dollop. With the right techniques and a touch of patience, you can whip your cream to fluffy perfection that holds its shape and elevates any dessert. So next time you reach for that whisk, remember: it’s all about the balance of cold, speed, and timing. Whip it right, and your creations will not only look stunning but also melt beautifully on the palate, turning every bite into a little celebration of texture and taste. Here’s to turning simple cream into your secret weapon in the kitchen!