there’s something truly magical about the silky, tangy goodness of homemade yogurt-creamy perfection that transforms ordinary breakfasts into moments of pure delight. But achieving that ideal texture and flavor often feels like a culinary mystery, reserved for chefs with specialized skills or equipment. Enter the sous vide method: a game-changing technique that takes the guesswork out of yogurt-making and guarantees consistently smooth, luscious results every time. in this article, we’ll unlock the secrets to mastering creamy perfection with an easy sous vide yogurt recipe that anyone can try at home. Get ready to elevate your kitchen craft and savor the rich, velvety taste of yogurt made just the way you like it.
Master Creamy perfection with sous vide yogurt is a culinary adventure that unlocks the rich, velvety texture prized in artisanal dairy. This method’s magic lies in its precise temperature control, allowing beneficial bacteria to thrive and transform simple milk into a luxurious, tangy delight. Originating from traditional yogurt-making practices, sous vide elevates the art with scientific accuracy, marrying texture and flavor in a way that’s exceptionally smooth and consistent.
Understanding the Science Behind Creamy Sous Vide Yogurt
At the heart of Master Creamy Perfection is the delicate balance between heat and time.yogurt cultures,primarily Lactobacillus bulgaricus and Streptococcus thermophilus,ferment lactose into lactic acid,thickening the milk and imparting that characteristic tang. Sous vide ensures this fermentation occurs evenly at a steady temperature-typically around 110°F (43°C)-avoiding the unpredictable spots of overheating or cooling you might find with traditional stovetop methods. This results in a perfectly creamy consistency without graininess or separation.
Selecting the Ideal Milk and Cultures for rich Texture
The foundation of any great sous vide yogurt is your choice of milk and starter culture. Opt for whole milk or a blend of whole and 2% for the richest texture. Higher fat content contributes to a luscious mouthfeel, but for lighter versions, 2% can still offer excellent creaminess. Avoid ultra-pasteurized milk; instead, choose pasteurized but not UHT-treated milk for better curdling and probiotic vitality.
For cultures, fresh store-bought plain yogurt with live active cultures works well as a starter, or you can use freeze-dried probiotic capsules containing Lactobacillus and Streptococcus strains. Using a high-quality culture ensures your yogurt develops those depthful flavors and that gorgeous creaminess essential to Master creamy perfection.
Step by Step Guide to Achieving Perfect Temperature Control
- Heat the milk gently: Pour your milk into a glass jar or heat-safe container and preheat it to 180°F (82°C) using your sous vide bath. Hold at this temperature for 30 minutes to denature the proteins for better texture.
- Cool milk to incubation temperature: Reduce sous vide temperature to 110°F (43°C). Let the milk cool to this temperature inside the water bath to prepare for inoculation with the starter culture.
- Inoculate the milk: Stir in your starter culture thoroughly but gently to avoid incorporating excess air, which can create unwanted bubbles.
- incubate with precision: Seal the jars and submerge them fully in the sous vide water bath, maintaining 110°F (43°C) steadily for 6 to 8 hours. Resist the urge to disturb the jars for consistent fermentation.
- Cool and set: Once the incubation is complete, move the jars to the refrigerator and chill for at least 4 hours to let the yogurt set and thicken further.
Tips for Customizing Flavor and Texture to Suit Your Taste
- For tangier yogurt: Extend fermentation up to 12 hours, checking occasionally for firmness and acidity.
- For creamier yogurt: Substitute part of the milk with heavy cream or add powdered milk at the heating stage to boost creaminess without changing volume drastically.
- Flavor infusions: Stir in vanilla bean paste, honey, or fruit purees after incubation but before chilling to keep flavors bright and fresh.
- Consistency adjustments: Whisk the yogurt gently after chilling for a silkier texture or leave undisturbed for a more custard-like firmness.
- Experiment with cultures: Try probiotic blends from reputable sources like this NIH study to find flavor profiles that suit you best.
Prep and Cook Time
- Prep Time: 10 minutes
- Cook/Incubation Time: 6-8 hours
- Chill time: 4 hours minimum
Yield
Approximately 4 cups (about 950 ml) of creamy sous vide yogurt
Difficulty Level
Easy – Ideal for both beginners and seasoned home cooks wanting consistent results
Ingredients
- 4 cups whole milk, pasteurized (avoid ultra-pasteurized)
- 2 tablespoons plain yogurt with live active cultures or 1 probiotic capsule (approximately 1/4 teaspoon starter)
- Optional: 2 tablespoons powdered milk (for extra creaminess)
- Optional: 2 tablespoons heavy cream (for richer texture)
Instructions
- Preheat your sous vide water bath to 180°F (82°C). Pour the milk into a clean, heatproof jar or container. If using powdered milk, whisk it into the milk before heating. Seal the jar loosely and submerge in the bain-marie for 30 minutes.
- Lower the sous vide temperature to 110°F (43°C). Allow the milk to cool in the water bath to this target incubation temperature without opening the container.
- Once cooled, add the starter yogurt or probiotic cultures. Stir gently with a clean spoon until fully incorporated.
- Tighten the lid on the jar to prevent water contamination but ensure no airtight vacuum. Submerge back into the 110°F water bath. Maintain this temperature for 6 to 8 hours without disturbing.
- remove the jar carefully and place it in the refrigerator. Chill for at least 4 hours to fully set the yogurt’s texture.
- After chilling, give the yogurt a gentle stir if you prefer smoother consistency or scoop directly with a spoon for a thick, custard-like experience.
Chef’s Notes / Tips for Success
- Use sterilized jars and utensils to avoid unwanted bacteria affecting fermentation.
- Don’t shake or disturb the yogurt during incubation; stillness ensures smooth texture.
- Experiment with fermentation time. Longer incubation equals tangier yogurt.
- For double creaminess,add heavy cream only after heating milk,stirring well.
- Leftover yogurt makes a fantastic base for smoothies, dressings, or luscious parfaits.
Serving Suggestions
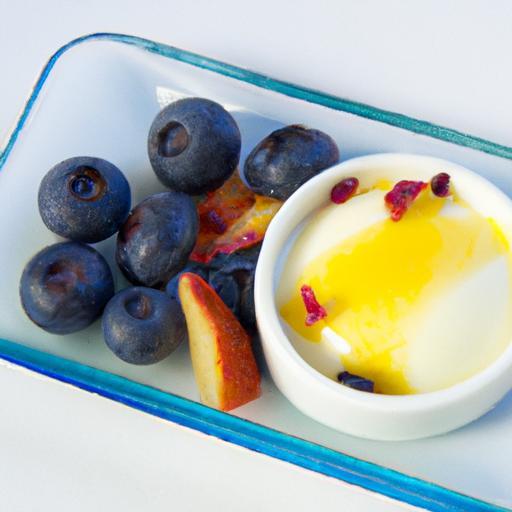
Serve your creamy sous vide yogurt with a drizzle of honey, a handful of freshly sliced berries, or a sprinkle of toasted granola for textural contrast. For visual appeal,garnish with edible flowers or chopped mint leaves. it also pairs beautifully with warm fruit compotes or a dash of cinnamon. Transform your yogurt bowl into a vibrant breakfast or a cooling dessert that’s as stunning to look at as it is to taste.

| Nutrient | Per 1/2 cup Serving |
|---|---|
| Calories | 90 |
| Protein | 6g |
| Carbohydrates | 7g |
| Fat | 5g |
For more on sous vide cooking techniques and beyond, explore our Ultimate Guide to Sous Vide Cooking to elevate every dish with precision and creativity.
Q&A
Q&A: Master Creamy Perfection - Easy sous Vide Yogurt Recipe
Q1: What makes sous vide yogurt different from regular homemade yogurt?
A: Sous vide yogurt stands out for its ultra-creamy texture and consistent tang, thanks to the precise temperature control sous vide offers. Unlike traditional stovetop methods,which can fluctuate in heat and risk curdling or uneven fermentation,sous vide gently nurtures the cultures in a bath of steady warmth,resulting in velvety,silky yogurt every time.
Q2: Why use sous vide for making yogurt? Isn’t it complicated?
A: Surprisingly, sous vide simplifies yogurt-making! Once you have your sous vide setup ready, the process is hands-off – just mix, seal, and submerge. The immersion circulator does the work, maintaining the perfect incubation temperature, eliminating guesswork and room for error. Perfect for yogurt novices and seasoned cooks alike.
Q3: What ingredients do I need for this sous vide yogurt recipe?
A: Keep it simple: fresh whole milk (or your milk of choice),a bit of plain yogurt with active cultures (as your starter),and that’s about it. Some recipes add a touch of powdered milk for creaminess, but the real magic is in the technique, not the extras.
Q4: How long does the sous vide yogurt take to set?
A: Typically, 6 to 8 hours at around 110°F (43°C) does the trick. For a tangier flavor and firmer texture, you can extend incubation up to 12 hours. the beauty of sous vide is that you’re in control - longer time equals richer depth of flavor.
Q5: Can I make flavored yogurt using this method?
A: Absolutely! You can stir in natural flavorings like vanilla extract, honey, or fruit purees after the yogurt has set and chilled. Avoid adding sweeteners or flavors during incubation as they can interfere with bacterial growth.
Q6: Is sous vide yogurt healthier or more probiotic-rich than store-bought?
A: homemade sous vide yogurt often boasts fresher live cultures and fewer additives than commercial brands.By controlling the fermentation time and temperature, you optimize probiotic growth, perhaps enhancing the health benefits.
Q7: How do I store my sous vide yogurt?
A: After incubation, cool your yogurt rapidly in the fridge to halt fermentation. Store it covered in an airtight container for up to 2 weeks.The flavors will mellow and the texture may thicken slightly over time.
Q8: What if I don’t have a sous vide cooker-can I still try this recipe?
A: While a sous vide circulator guarantees precision, you can improvise with a well-insulated container to hold warm water at a steady temperature, changing the water as needed. However, expect less consistent results. Investing in a sous vide device unlocks a new level of yogurt perfection.
Q9: any tips for achieving the creamiest sous vide yogurt?
A: Use whole milk for richness,pre-warm your milk before adding the starter culture,and ensure your starter yogurt is fresh and active. Also, be patient-the longer, gentle incubation is key to that signature creamy texture.
Q10: Can I use non-dairy milk for sous vide yogurt?
A: Yes! Plant-based milks like coconut, almond, or cashew can be used with vegan starters. Keep in mind texture and firmness may vary since these milks lack the natural proteins of dairy. Thickening agents like agar or tapioca starch can definitely help mimic creaminess.
Embark on your sous vide yogurt journey and enjoy the enchanting alchemy of turning simple milk into luscious, creamy perfection – all with a touch of science and a splash of culinary magic!
Final thoughts
There you have it-a simple, foolproof path to mastering creamy, dreamy yogurt right in your own kitchen with the magic of sous vide. By harnessing precise temperature control, you unlock the secrets to silky texture and tangy flavor that homemade yogurt simply can’t match from the store. Weather you’re a seasoned foodie or a curious beginner, this easy recipe invites you to experiment, customize, and savor every luscious spoonful. So grab your sous vide setup, gather your ingredients, and get ready to elevate your yogurt game to perfection-because once you taste the difference, there’s no turning back. Happy culturing!